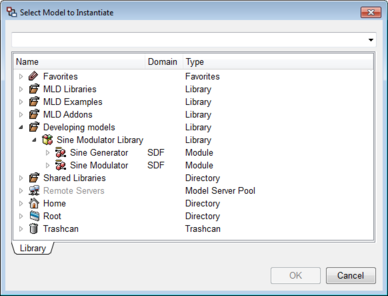
There are different ways to create new instances.
- Using the drag and drop capability of the tree view item.
- Using the copy and paste capability between Model Editor Windows.
- Using the context menu item Add Instance of the Model Editor Window.
- Using the tool button Add Instance.
The easiest way to create a new model instance is to select the item in the Library view and drag the item onto the Model Editor Window. A model instance that refers to the model component referenced by the tree view item is created in the model Model Editor Window.
It is possible to copy and paste model instances between different Model Editor Windows. You can select and copy model instances from one Model Editor Window into the clipboard and then paste the contents of the clipboard into another Model Editor Window. If complete connections belong to the selection, they are copied, too. Connections are complete if all the model instances to which the connection is attached were selected.
The third way is to right-click at the position where you would like to create a new model instance. Select the context menu item Add Instance ... to open a Select Model dialog. From this dialog you can select the model component you would like to instantiate in the active Model Editor Window.
By using the Add Model tool button, MLDesigner switches to the block creation mode indicated by a special cursor. In block creation mode, you can create new model instances at the current cursor position wherever you click on the Model Editor Window background. As with the creation of model instances using the context menu a Select Model window is displayed from which you can select the model component to be instantiated. Right-click the mouse to cancel block creation mode or click the tool button Select Tool.
MLDesigner generates a unique name for every created model instance. This name is generated using the physical name, also called “class name”, of the model component and extending it with an integer preceded by a hash (#). On selecting a model instance the Instance Properties plane in the property editor window is activated. The property Name shows the generated name of the model instance. The name is a model instance property that cannot be changed. It is used to identify the model instance uniquely within the hierarchical system model during simulation, see Simulation with MLDesigner.
